
7 Best Drones for Real Estate Photos and Video (2024 Reviews)
Real Estate Bees’ editorial team asked a few industry leading real estate photographers to share their expertise on the best drones for real estate photography and videography to help our readers make a more educated purchase decision when shopping for a drone.

With the help of the experts, we ranked the most popular drones used for real estate photography and video recording from best to worst and described their features, pros and cons. Visiting retailers of the listed products by clicking links within our content may earn us commissions from your purchases but we never receive any compensation for the inclusion of products and/or services in our consumer guides. Read our editorial guidelines to learn more about our review and rating process.
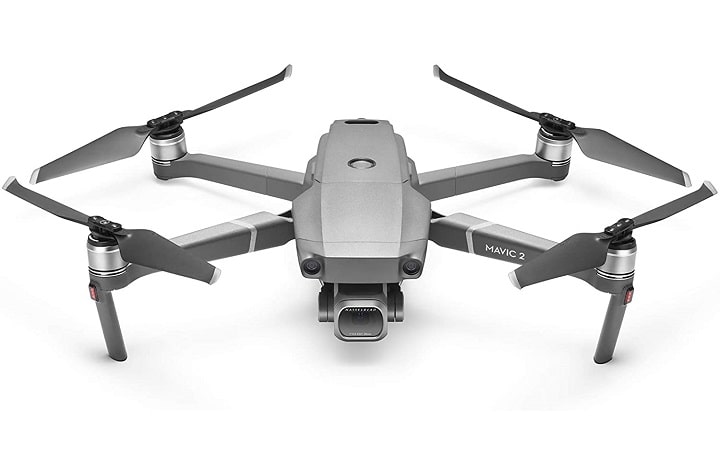
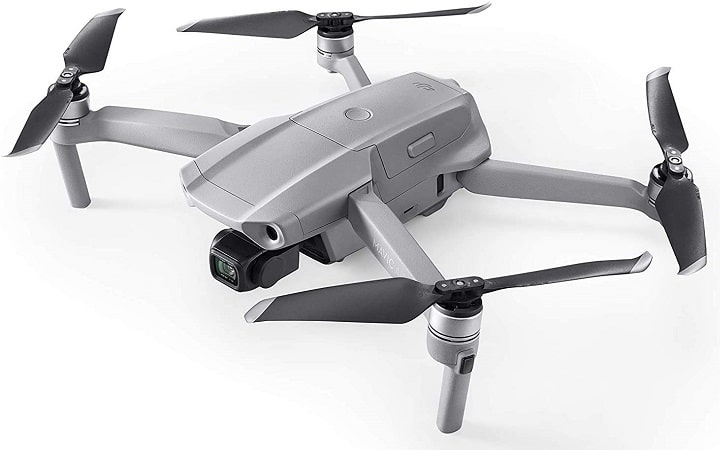
#1 DJI Mavic 2 PRO
Drone Highlights
- Average battery life of 35 minutes
- Shoots RAW photos
- HDR-quality photos and videos
- Camera features a 1” sensor
- Zoom function
- Adjustable resolution
- Object avoidance feature
- Comes with different sensors
- Gimbal stabilization feature
Works Best For
- Architectural photography
- Daytime photography
- Twilight photography
- Aerial drone photography
- Real estate photography
- Interior and exterior shots
- Promotional video
- Car videos
- Wedding videos
- Nature documentaries
- Thermal inspections
Pros
- Excellent camera quality for both photos and videos
- Impressive optics
- Long battery life
- Can shoot at long range
- Easy to use
- Shoots RAW images
- Zoom function allows users to capture tight places or more details
- Allows users to switch into multiple resolutions
- Stable even in strong winds (up to 45 mph)
- 1” sensor makes it easy to shoot in low light and offers remarkable signal-to-noise ratio
- Different sensors make the device fail-safe and comfortable to use even for newbies
- Object avoidance function allows users to shoot in areas with low trees or cable lines
- HDR capability makes color grading and correction a breeze
- Compact and portable
- Lightweight
- Durable
- Reliable
- Versatile
The DJI Mavic 2 Pro brings together all the best-in-class features that can be found in a real estate photography and videography drone. What makes it stand out for most of the real estate photographers surveyed is its camera quality that captures amazing photo and video shots.

For real estate photography and video, most drones have the relatively same features and performance capabilities. However, what separates the men from the boys is the camera. The sensor size is everything.
Currently, 1” sensors are the best you can get, but the price tag goes up considerably. But if you want the best picture quality, then it’s well worth it. 1” sensors will get you 4:2:2, 10-bit recording with V-Log.
These sensors are very good in low light, which is a must, and terrific signal-to-noise ratio, or High Dynamic Range. This means your highlights and shadows will look better because the sensor can handle more information.
Color grading and color correction is a breeze with HDR. If you are serious about delivering the best quality content to your agents then this is a no-brainer.

The Mavic 2 Pro is a clear winner for our residential and commercial drone photography needs because its camera is amazing. DJI partnered with legendary camera company Hasselblad to make a drone that allows us to capture clear images and gorgeous video.
The Mavic 2 Pro records high enough video quality that we can use it for big-budget promotional videos.
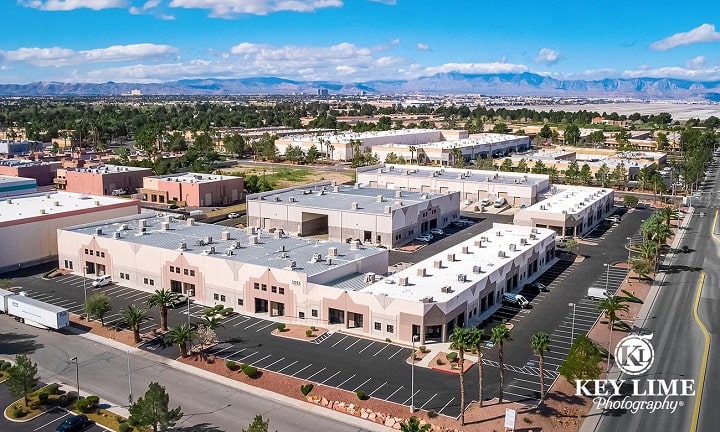
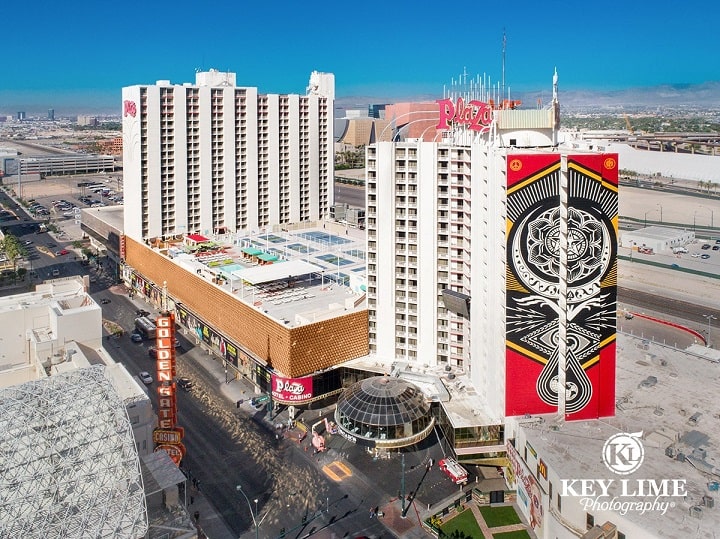
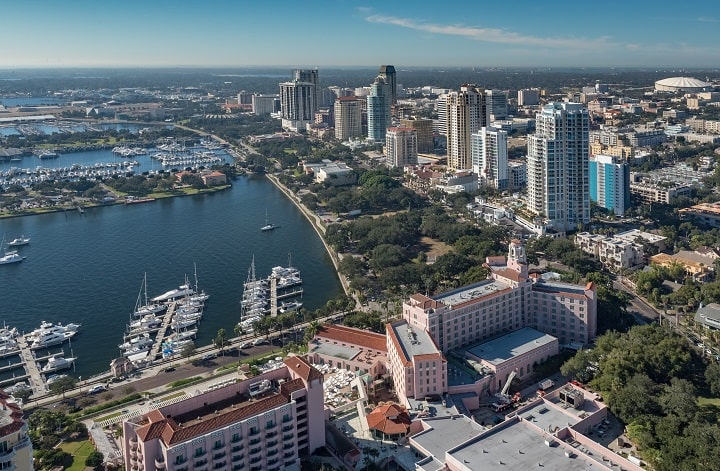
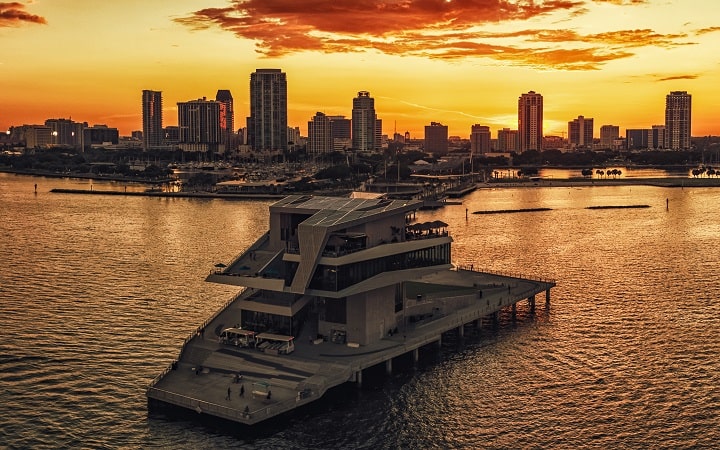
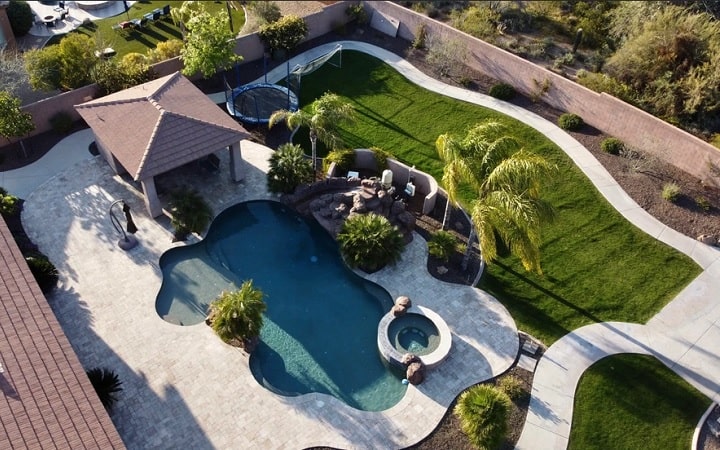
Below are photos taken with DJI MAVIC 2 PRO by Joey Ungerer.

This drone has excellent optics and is easy to use. The Hasselblad camera sports a 1” sensor, so your images are very impressive.

What makes this drone the best is that it has an amazing quality camera and allows the user to switch into multiple resolutions.

It produces excellent photo and video quality. The best part is that it shoots RAW photos.
Apart from providing outstanding photo and video quality, this drone can withstand windy shoots and has a long battery life.
This drone is extremely stable in winds up to 45 mph and also has an average battery life of 35 minutes, which is plenty enough to do what is necessary for some good videos for real estate.

There is also this added security of the weight of the system. Although it is not as bulky as the Phantom Series or as small as the Mini or Spark series, it is the perfect weight to perform in windy situations.
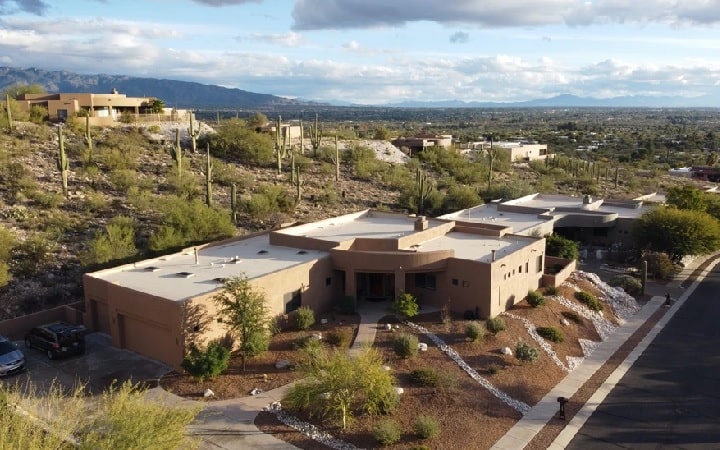
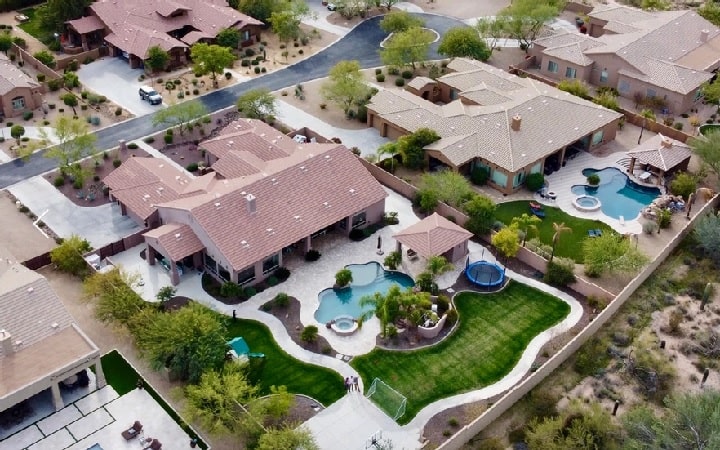
Below is a photo taken with DJI MAVIC 2 PRO by Barion McQueen.
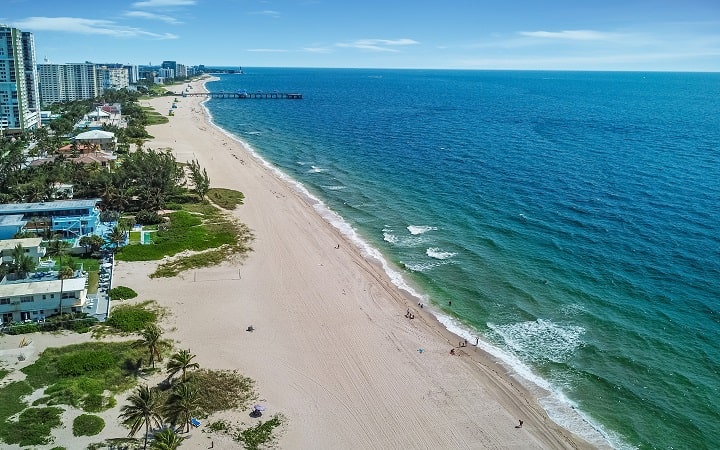
Moreover, this drone makes it possible for users to shoot in locations where detail is a must, without capturing scenes that aren’t needed.
The Mavic 2 Zoom model enables you to zoom into tight places, or show more detail, such as a roof.
The sensors and object avoidance is crucial when shooting in neighborhoods with low trees as well as cable lines.
Such impressive features all come in a compact, lightweight package that is easy to use and a joy to fly, with a great price to boot.
Another important benefit to our aerial photography is its portability. The drone and camera are compact enough to make travel very easy.
What I like about this drone is that it’s small and easy to carry. It is also very easy to fly, quiet in the air, and available at a decent price.
The last and final pro to this drone is it has many different sensors that keep the user from wrecking this drone. These sensors make the drone almost completely fail-safe and more comfortable to fly as a beginner.
Below are videos recorded using DJI MAVIC 2 PRO by Mitch Warren.
Cons
- Too lightweight
- Loud
- A bit pricey
The downside to having top-of-the-line features is that the price tag doesn’t come cheap. This rings true for the DJI Mavic 2 Pro.
The only con about this drone is the price. It’s definitely more expensive than most, but the price is definitely worth paying for what you get.
You are looking at a price point between $1500-2000 for a complete setup. Also the batteries’ cost. For the cost of a few backup batteries you can get a whole Mavic Mini.
Being lightweight also comes as a disadvantage, as well as the loud noise that this device produces.
The drone’s lightweight design means that high winds can be a nuisance. However, the camera/gimbal stabilization continues to impress during every flight. Wind is almost never a problem.

Due to its smaller size, hazard to wind and constant concerns along coastal real estate areas may be faced by users when using this drone.
Below is a video recorded using DJI MAVIC 2 PRO by John Hunter.
The Mavic Pro 2 is loud. When I am shooting in neighborhoods, every time I take it out, the neighbors come out of their homes because they think it’s a plane outside.
#2 DJI Inspire 2

Drone Highlights
- Interchangeable lens
- High dynamic range
- Flight controls
Works Best For
- Architectural photography
- Daytime photography
- Twilight photography
- Aerial drone photography
- Cityscapes
- Landscapes
- Creative artwork
- Video productions
Pros
- High image quality
- Ease of use
- Sturdy
- Versatile
- High dynamic range for low light shoots
- Camera stability
- Enhanced flight controls
- Produces cinematic quality videos
The Inspire 2, just like any drone under the DJI brand, is a powerhouse in terms of offering superb image quality both for photos and videos. This is complemented by a multitude of other amazing features that make this drone a standout.

The image quality and ease of use is superior to other drones I have flown. It’s very sturdy and handles high winds well, which makes for very smooth videos and sharp photos.
The X5S or X7S camera systems have a higher dynamic range which helps with low-light shooting. In addition, the ability to change lenses is really a game changer when it comes to your creative abilities with a drone.
Overall, the DJI Inspire 2 is far superior and more versatile than the smaller drones on the market. Interchangeable lenses, high dynamic range, camera stability, enhanced flight controls, and ease of use make this drone an exceptional value.
Below are photos taken with DJI INSPIRE 2 by Joe Sale.

This drone has shown to be consistent and does well in many different weather conditions. It offers ease of use, interchangeable lens, and amazing crisp cinematic quality.
Cons
- Not portable
- Can take up a lot of space
- Performance depends on the photography equipment used
The DJI Inspire 2 can be a burden to carry around because of its weight and can eat up a lot of space when it goes into travel mode.
The Inspire 2 is a very large drone and is not as portable as the smaller DJI models. While it does go into ‘travel mode’, the drone, its controllers, batteries, and other accessories can take up a lot of space.
Its capabilities also only shine through when used with certain photography equipment.
This drone is limited to what kind of equipment is used for photography.
#4 Autel Robotics EVO II
Drone Highlights
- Comes in a variety of setups
- 360 degree sensors
- Offers an app for easy navigation
Works Best For
- Architectural photography
- Daytime photography
- Twilight photography
- Aerial drone photography
- Aerial videography
Pros
- Good battery life
- Variety of models
- Obstacle avoidance feature
- Durable
- Easy navigation through the app
- High quality
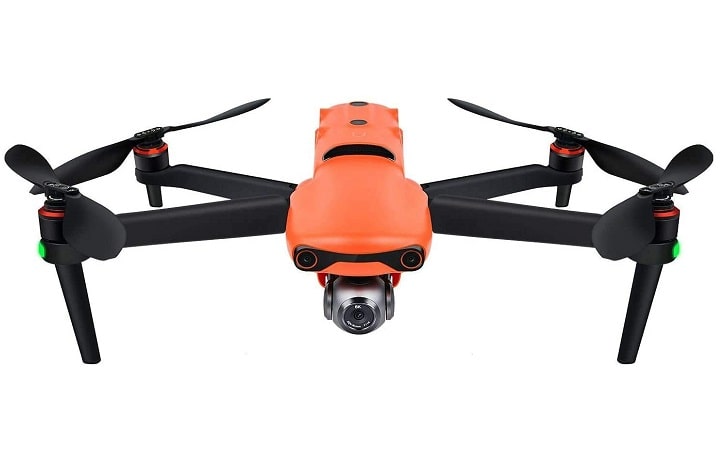
The Autel Robotics Evo II may not be as popular as the DJI brand, but it certainly doesn’t fall behind when it comes to quality and features.

The Autel EVO II offers great battery life and comes in multiple models that feature 8K, 6K, and 4K capabilities. It also features 360 degree sensors for obstacle avoidance which is a must when flying in tight spaces trying to get the perfect shot. We have also found it to be incredibly durable in rare occasions that it has had an accident. Lastly, it is made in the US.
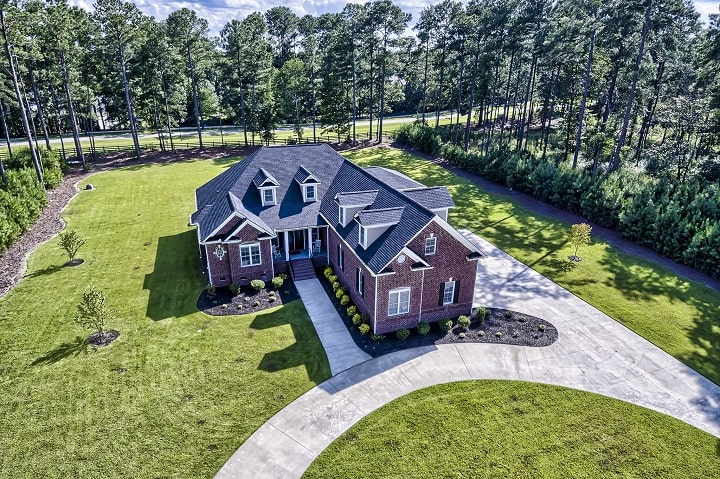
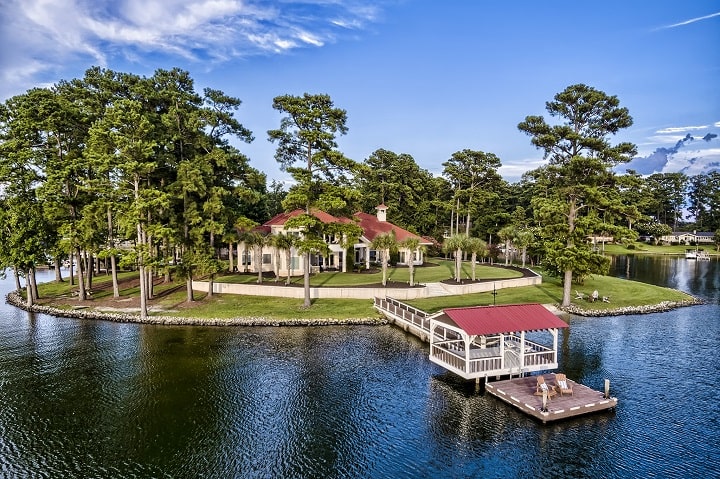
Below are photos taken with Autel EVO II by Nate Hughes.
The battery life of this drone is what makes it a good alternative to more popular drone brands.
With DJI having issues when launching certain drones when battery was under 75% charge, we have not had any issues of the sort with Autel drones.
Apart from its outstanding features, it comes with an app that allows users to easily navigate options.
It offers a less intrusive app with easier to navigate options. The app is what got our attention to try out this brand; the quality is what has made us long-term clients.
Cons
- Finding accessories can be a bit challenging
As it is not as popular or well known as its competitors, finding accessories can be a little more challenging.
#3 DJI Mavic Mini

Drone Highlights
- Small
- Portable
- Weighs under 0.5 pounds
Works Best For
- Daytime photography
- Twilight photography
- Aerial drone photography
Pros
- Portability
- Lightweight
- Sturdy
- Works just like the DJI Mavic Pro 2
- Affordable
The DJI Mavic Mini can be considered as the mini version of the more popular DJI Mavic Pro 2.

The Mavic Mini is 90% of the Mavic Pro 2, but 25% of the price. It can accomplish almost everything you will need for basic shots, and this is why I chose it over a higher-end drone.
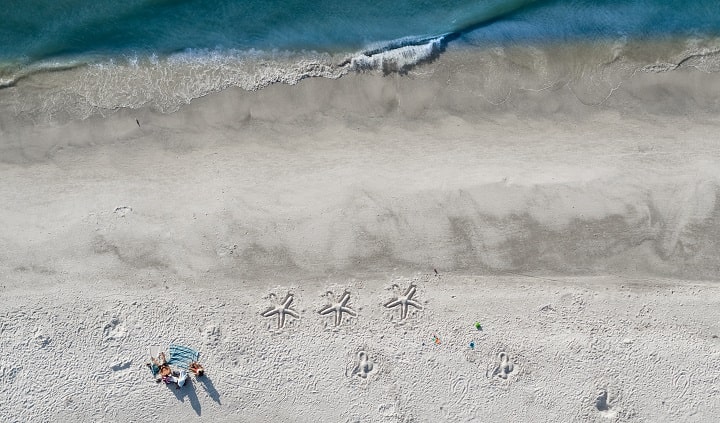
Below are photos taken with DJI MAVIC MINI by Nathan Holmes.
The best part about this drone is that it delivers great results despite its compact and lightweight design.
Portability is a huge factor in photography. Most often, the camera you have with you is the one you will use the most.
The Mavic Mini is one of the best drones on the market because of how portable it is. You can carry it anywhere, even in your pocket. It’s also under 0.5 pounds, which allows you to fly pretty much anywhere, even in foreign countries where many drones could be illegal.
It looks like a toy but performs like a tool, which is why the Mavic Mini is one of the best choices you can make as a beginning drone operator.
Cons
- Too lightweight
However, being lightweight may not always be an advantage, especially when using the DJI Mavic Mini during windy shoots.
Despite its small size, it can fly in very windy conditions. I’ve flown mine in 25 mph wind before in sport mode and it performed very well. Beyond that point, however, it is slightly scary to fly such a light drone in heavy wind.
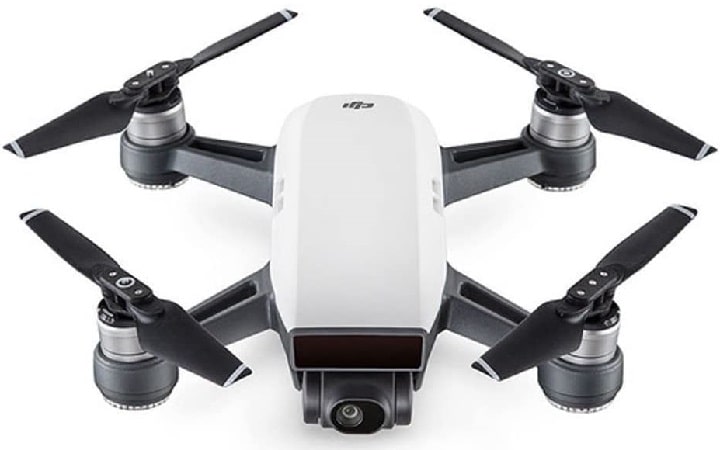
#5 DJI Spark
Drone Highlights
- Small
- Portable
- Good camera quality
Works Best For
- Architectural photography
- Daytime photography
- Aerial drone photography
Pros
- Easy to pack
- Easy to operate
- Produces sharp photos
- Great ability for good exposures
- User-friendly remote
- Affordable
The DJI Spark is one of the models under the popular drone brand that stands out for its portability. Don’t be fooled, though, by its size as it packs great features as well.

This drone is super small, easy to pack, and easy to operate. The camera is sharp and has great ability for good exposures. I love the ease of the drone and the remote, making it easy for me to offer the service to my clients.
I got the Spark mostly for price. It was affordable for me as a beginner, to see if it was easy enough and profitable enough. I also liked it because it was small, so it felt less daunting.
I was skeptical because I’ve never used a drone before and was worried I couldn’t figure it out. But with a few practice flights under my belt, I was able to give my clients just what they need.
Cons
- Low battery life
The only con, and it’s a huge one… the battery life is absolutely ridiculous. The user must keep it fully charged right to use, and then get only 10-15 minutes of flight time (depending on the weather: if it’s cold, it decreases the battery life). Super frustrating!
#6 DJI Mavic Air 2
Drone Highlights
- 4k video
- Active track
- Automatic bracketing
- Obstacle avoidance function
- 34-minute flight time
- ½” sensor
Works Best For
- Real estate photography
Pros
- Good camera quality
- Affordable
- Advanced features
Just like the other models under the DJI brand, the Mavic Air 2 offers a great number of features that make it a good choice for drone photography and videography, at a price that won’t put a dent in your wallet.

The Mavic Air 2 provides all the necessary features for real estate photography/videography (4K video, plenty of megapixels, active track, automatic bracketing, obstacle avoidance, 34-minute flight time, the list goes on) with a price tag of less than half of the Mavic 2 Pro.
The only real advantage of the Mavic 2 Pro, which I do own and use for architecture shoots, is the larger 1” sensor instead of the Air 2’s 1/2” sensor. But for real estate photography, the 1” sensor is really overkill.
Other than that, the combination of advanced features, camera quality, and reasonable price point makes the Mavic Air 2 the most budget-friendly but also professional choice for real estate photography.
Cons
- Too lightweight
- Sensor isn’t large enough
As it has a small size, the DJI Mavic Air 2 may not be the best drone to use when shooting in windy locations.
The Air 2 is significantly smaller than the Mavic 2 Pro or Phantom 4, and as a result, it is more susceptible to high winds. But in my experience, it can handle typical elevated wind speeds of 15-20 mph without any trouble.
Apart from being too lightweight, this drone doesn’t have a large enough sensor to produce detailed photos.
It works best for real estate photography but not architectural. The sensor isn’t large enough to create detailed images for architecture clients.
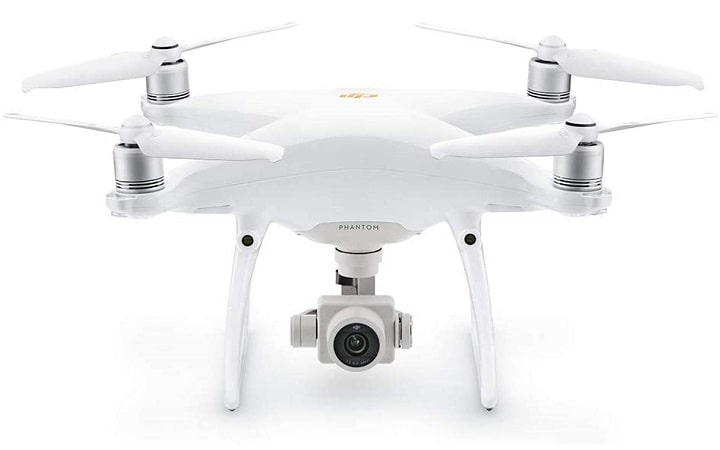
#7 DJI Phantom 4 Pro V2.0
Drone Highlights
- 20 MP camera
- 4K video
- Mechanical shutter
- Produces RAW images
Works Best For
- Daytime photography
- Twilight photography
- Aerial drone photography
Pros
- High resolution
- Mechanical shutter
- Produces RAW images
- Reliability
The DJI Phantom 4 Pro V2.0 delivers great images and videos, thanks to its 20 MP resolution. It performs well, too, when shooting RAW images.

I have two P4 Pro drones. The 20 MP camera on the P4 Pro model is outstanding for both 4K and stills. It has a mechanical shutter and produces excellent RAW images.
I used to have the P3 Pro but wanted higher resolution. I have since looked at other comparably priced drones but none have the reliability and feature set of the P4P.
Cons
- Lacks certain features
Interchangeable lenses or a zoom lens would be nice to have.
What Is the Best Drone for Real Estate Photography and Real Estate Video?
Best Overall: DJI Mavic 2 Pro
Delivering all the best features in one device, the DJI Mavic 2 Pro is a true leader among real estate photography and videography drones.
I chose this drone because of its versatility. DJI has definitely become the standard when it comes to drones and all of their systems have great things about them.
I chose the Mavic Pro 2 because, although the pricing is high, it is the workhorse out of all the drone types. When you do a lot of shoots, you need something reliable in any situation because you’ll never know when you show up to these homes what conditions you are dealing with. The Mavic Pro 2 will handle any situation in the field.
As a photographer who has several different drones, the Mavic Pro 2 is my number one choice. As much as I love the Mavic Mini, the Mavic Pro has the overall performance required to perform in almost every real estate situation in the field.
I have had a Mavic Mini get taken by the wind on a photoshoot for real estate. So the Mavic Pro 2 is the most reliable system for every situation. Lightweight but durable, excellent camera quality, and object avoidance.
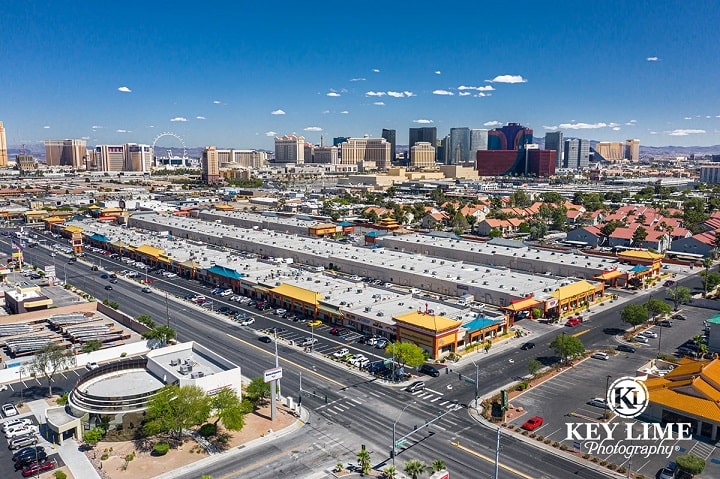
When we invest in top-tier equipment, we tend to save it for high-paying jobs as a means of reducing risk of damage. Aerial real estate photography is our primary use for the Mavic 2 Pro here in Las Vegas.
This drone was the best option for us because the price is low enough to justify using it on a frequent basis. Thankfully, the camera captures beautiful architectural images as an added bonus. The cherry on top is the durability and reliability that comes with any equipment from the DJI brand.
I chose this drone over others because of the camera quality. This drone is out of the box one of the best drones because the camera is absolutely insane. I didn’t even think twice when purchasing this drone and I have had 0 second thoughts about my purchase.
With these amazing features, the DJI Mavic 2 Pro is the best drone for real estate photography and videography:
- Excellent camera quality both for photos and videos
- Impressive optics
- Long battery life
- Can shoot at long range
- Easy to use
- Easy to fly
- Shoots RAW images
- Zoom function allows users to capture tight places or more details
- Allows users to switch into multiple resolutions
- Stable even in strong winds
- 1” sensor makes it easy to shoot in low light and offers remarkable signal-to-noise ratio
- Different sensors make the device fail safe and comfortable to use even for newbies
- Object avoidance function allows users to shoot in areas with low trees or cable lines
- HDR capability makes color grading and correction a breeze
- Compact and portable
- Lightweight
- Durable
- Reliable
- Versatile
Best for Newbies
DJI Mavic Mini
The DJI Mavic Mini is a good choice for newbie real estate photographers who want to get into drone photography or videography as it offers both quality and affordability.
The Mavic Mini has tons of features at an incredibly low price point for a nearly professional-quality drone. Its video quality is not quite up to snuff for professional use, but it’s a great stepping stone to see if you want to wade into the deep end of the drone market.
I think the best drone for newbies is the Mavic Mini. It is a super affordable drone you can get for less than $400 with a great camera and very easy to use.
DJI Mavic 2 PRO
Apart from being the best drone for professionals, the DJI Mavic 2 Pro is likewise a smart choice for newbie photographers who want a drone that has all the best features in one system.
Definitely the Mavic 2 Pro because of its many fail-safe systems.
DJI Mavic Air / Mavic Air 2 / Spark
DJI models like Spark and Air are good choices for newbies because of their price and user-friendly features.
I would say the Mavic Air 2. For about $800, it’s compact, has great optics, and is easy to use. For the money, it packs a lot. I purchased the Mavic 2 Zoom for $1,900 in November 2019. The Air 2 came out 6 months later and is as good or better. For half the price.
Start with the DJI Mavic, Air, or Spark. They offer great quality and you will learn how to fly using smaller, less expensive drones.
Any Model Under the DJI Brand
For the real estate photographers surveyed, any model from the DJI brand can be a great choice for newbies as most of its models are easy to use. Moreover, because it is the most popular brand today, users won’t have a hard time finding replacement parts or accessories.
Drones are inherently difficult to dive into for the first time. However, DJI does a good job of making their products user-friendly.
DJI is the most common brand which could be a plus for some just starting out because of the availability of replacement parts after an inevitable crash.
Skydio 2
Skydio 2 would be a great choice for any newbie real estate photographer.
Experts' Choice Breakdown for Real Estate Photography Drones
7 Expert Tips on Choosing the Best Drone for Real Estate Photography and Video
#1 Consider Getting a Used or Cheap Drone for Practice
Before purchasing the one that you will use for work, buy a used or cheap drone that you can use for practice. It is important to learn all about the tool first and how it works.
Take your time to learn the flight modes and the drone’s capabilities, then upgrade as you progress in your abilities. Remember, buying a used drone is a great way to save money on the latest equipment, look for bundles, extra batteries, upgrades… all things you will want to have.
If you are just getting into drone photography, buy something in the $20 range off of Amazon. Practice with it and crash it without worrying too much. Buy something simple to practice with.
#2 Start with a Smaller Drone that Fits Your Budget
When just starting out, it is best to find a drone that is not too intimidating to use and fits your budget. When choosing, keep in mind that you want a drone that will work best for you.
For myself, the DJI Mavic 2 Zoom is perfect. But you can have success with other drones, like the DJI Phantom, or the Yuneec, or others.
See what works best for you and what delivers the quality images you need. Also, whatever fits your budget. There is a wide array of aircraft at multiple levels to fit any budget. Find what works for you image-wise, and see if it fits whatever your budget is. Chances are, you will find the right fit.
Stay within your budget. If you are not getting a lot of drone work that will pay for the system, start off with something more entry level.
Consider where you plan on flying the drone. For example, if you are looking to fly in a location that requires a long walk or time, maybe you should get a drone that will allow you to travel light.
Unless you are making $500+ weekly, there is no need to purchase something bigger than a Mavic Mini. Take some time and prove to yourself that you can make money with a smaller drone first. Then take the leap to a Mavic Pro 2 or Inspire 2.
Choose a drone that you won’t feel shy about using. The equipment should not be too intimidating or too precious to use.
Do your research to determine which drone is best for your needs. If you’re just starting out, start with a smaller drone.
#3 Don’t Compromise Quality over Price
Spend the money on a nice drone and learn it slowly, so you don’t have to worry about tech issues and can just focus on getting good video. It’s much easier to focus on one thing and you don’t want to be dealing with technology problems when trying to focus on making a video for your clients.
Always get the best you can afford and learn it.
#4 Determine Your Specific Needs and Choose an Appropriate Model
Pick a drone best suited for what you are doing. Choose a larger drone with longer battery life if doing videos for subdivisions, whereas you may want a smaller drone for getting into tight spaces (like in between limbs).
Buy the drone that suits your needs, not the one that everyone says you should buy.
#5 Take Note of Must-Have Features
Drones that are available in the market today offer a variety of features, so it could get pretty confusing when picking out the best one. When shopping for one, remember that you need a drone with great camera quality, is very easy to use, and can be carried around easily.
At a minimum, get a drone with a pro-quality camera — mechanical shutter, full aperture, speed priority modes, >16mp, and the option for filters.
Don’t overspend. Don’t pay for features or quality that you don’t need. Think about real practical issues like portability instead of obsessing over the flashiest or fanciest drone.
Portability should be a consideration and how often you will be using the drone.
#6 Buy from Reliable Drone Makers
Whether it’s a cheap or expensive one, it’s better to buy a drone from manufacturers that are known in the business. This means avoiding the ones that offer too-good-to-be-true features or don’t have the features that you require.
I would avoid any drones at the moment that are not DJI. They are the industry standard and are the iconic brand in drones, just like the names Canon and Nikon.
There are going to be a lot of copycat companies that are trying to do what DJI is doing. But it is a reason why they are copying DJI. Because they are the elite.
Stick with manufacturers who specialize in drones and you will be fine. Don’t buy from internet ads or from companies you’ve never heard of.
Avoid the toys you see at the mall. DJI is pretty reliable, but there are other American-made versions that are making their mark in the industry.
Don’t spend money on brands that have gimmick features like small cameras or trick capabilities.
Avoid drones that don’t support camera RAW mode.
Stay away from drone manufacturers that are also leading the charge on anti-drone policies.
#7 Invest in Your Skills
No matter what kind of drone you use, it is having the right skills that will enable you to produce the results you want. Hone your photography and videography skills to get the most beautiful, eye-catching real estate photos and videos.
All I will say is to just avoid a cheap drone and spend the money on investing in yourself. With drones, what you get is what you pay for.
6 Expert Tips on Using a Drone for Real Estate Photography and Video Recording
#1 Read Up and Practice
Before getting any real work done, it is best to know the tool inside out. This means absorbing as much as you can about drones from reliable sources and practicing every day.
When getting a drone, fly it for the first time in an empty parking lot. Let yourself get comfortable flying the drone without looking at the remote camera.
When you feel more comfortable, slowly increase your height in the air and distance and build up from that. Patience and taking it slow is hands down the best way to master these amazing machines.
Practice. Purchase an online drone training program. Practice. Get FAA Part 107-certified, so you can go commercial and possibly make some money. Practice. Shoot and edit your material for a portfolio. Practice.
Educate yourself on the local laws and ordinances regarding where and when you can fly your drone. Practice. Download Be4UFly, KittyHawk, Airmap, or all three, so you can know which zone is safe to fly in at what altitude. Practice. Find out what LAANC means. Practice.
Read the manual, watch as many videos as you can, and enjoy.
Take your time. Learn the ins and outs of each drone and the camera system.
#2 Find the Best Locations for Flying
Pick locations that are safe and appropriate for drone flying. Use online tools and maps to help you find the best and safest locations.
Plan your photo shoots carefully using Google Earth. If 3D buildings are available, spend some time on Google Earth looking for the best angles (and for obstructions) before you get to the site. This will save a lot of time when trying to find safe locations where you can launch and land. Avoid trees and power lines, etc.
Scout your location ahead of time, plan for weather, and take all the necessary precautions. Don’t be ‘that guy’ who breaks the rules to get a great shot for the ‘Gram. Be better than that.
Verify if you are in an area that is close to an airport.
#3 Choose the Best Time for Shooting
Getting the best photos and videos entails shooting during the best time of day.
Finding a quality drone camera is important for capturing architecture. However, choosing the best time of day is paramount to capturing quality real estate images.
For the best blue skies, position the sun behind the camera and shoot when the sun is fairly high (about 10 a.m. or 3 p.m.). This is counterintuitive for most photographers because these are not the best conditions for portraits.
Check the sun angle and plan your shoots for optimal lighting of each face of the building(s).
Shoot at mid day when the sun is overhead to eliminate shadows.
Choose midday shoots so the lighting is best.
#4 Make Sure Your Drone Is All Geared Up and Ready
This means ensuring that your drone is fully charged and all the necessary tools and accessories to be used with it are properly equipped as well for the shoot.
Always have a backup battery for your system and ensure your system is fully charged. Make sure your lens is clean before taking it up and shooting. Check that your phone or iPad is completely charged prior to shooting.
#5 Plan Your Shots
Carefully plan all your shots. Take your time to get the best images. Incorporate a few tricks to get the results you want.
Get a good set of ND filters. Always shoot RAW. Shoot bracketed photos when there are strong shadows or a bright cloudy sky. With AEB and RAW, you can produce high-quality HDR (high dynamic range) photos in post.
Use the auto exposure bracketing to get raw photos for HDR processing. This will get you the best results for your photos. Also, don’t rush your shots.
Framing is key. No one wants to see a property dead on. Find ways to incorporate trees, the horizon, and leading lines into your shot to make your photography stand out.
Always scout which shots you want to take prior to even turning your drone on.
Don’t always fly high to shoot. Shoot AEB 5 and merge the photos in real estate photo editing software such as Lightroom to make an HDR.
Shoot raw! And treat your files like a very flat video profile. Use lots of contrast, dehaze, etc., to bring color and detail back into your images.
#6 Review Your Shots
Check each shot before taking your drone up for flight in each shoot.
When shooting, always review your shots before putting your drone up.
Learn More About Real Estate Photography Equipment
To help newbie real estate photographers, realtors and homeowners select the best equipment to photograph and film real estate, we at Real Estate Bees, in conjunction with a number of leading industry experts, created comprehensive consumer guides for various real estate photography equipment and accessories:
- Best Digital Cameras for Real Estate Photography
- Best 360 Degree and 3D Cameras for Virtual Property Tours
- Best Camera Lenses for Real Estate Photography
- Best Sony Lenses for Real Estate Photography
- Best Flashes for Real Estate Photography
- Best Tripods for Real Estate Photography
Additionally, you can read our article with real estate photography tips from professional photographers if you need general advice on real estate photography.