
30+ Real Estate Photography Tips for Realtors in 2024
Appealing and high-quality photos are the most essential detail in creating a positive first impression of a potential home buyer viewing your property listing.
Pictures are responsible in retaining a user on the page during the first few seconds, which is crucial for having more people eventually contact you to schedule the showing.
We reached out to a number of highly-skilled real estate photography professionals and asked them to share their expert advice on making stunning, quality photos that will help you attract as many interested home buyers as possible.
Here are over 30 most effective real estate photography tips that we collected for you.
6 Expert Photographers Share Their Tips on Taking Real Estate Photos
#1. Boaz Meiri, Boaz Meiri Photography Inc.

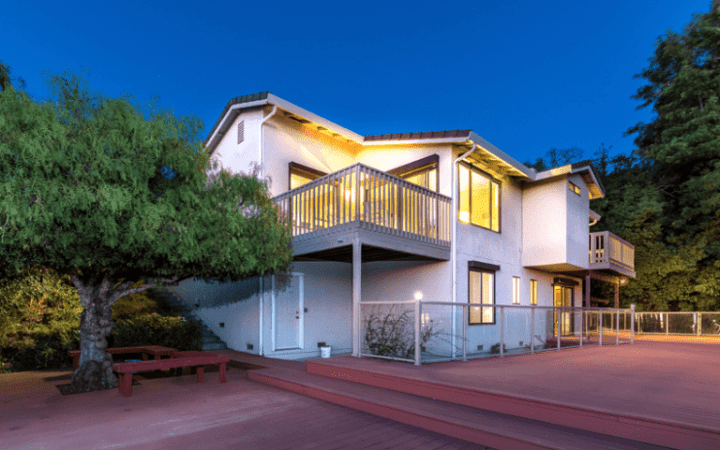
Tip 1 – Turn the Lights Off, Shoot with Natural Light
It is very common to shoot real estate with all the lights on, as a default. I prefer natural light. When we’re home during the day, we want to enjoy the natural light rather than turning all the lights on.
Correct? Then why showing the property with all the lights on, while there is plenty of sunlight outside? In most houses the light bulbs have a yellow tone to them and it affects the overall color of the interior. We want to keep the true colors of the interior.
Tip 2 – Turn the Lights On
Confused?? From time to time I turn on small lamps on the night stands, especially if the room is a little dark. The glow of the lights on the walls adds an intimate feel, even romantic. Also, in old Victorian style homes, wood cabins and dark interiors the lights add a warm feel that matches the mood that the interior provides.
Tip 3 – Angle of View
How wide should I shoot? This is also a very common way of shooting real estate: using the widest angle possible. True, it does make the spaces look much bigger but not only that it is deceiving the buyers, but it also causes distortion.
It is most noticeable with objects that are near the camera, on the side of the frame. Bathroom sink is a great example. When using an extremely wide-angle lens, a round sink would become oval.
So how do we capture the entire bathroom? We step back as much as possible and zoom in a little, making sure not to miss the faucet or other important features.
We can also take 2 different photos, in two different angles, depending on the layout. In some cases I take a horizontal image and then a vertical one, that shows the floor and possibly the light fixture above the sink.
The extremely wide-angle makes near objects much bigger and further objects much smaller. If we shoot a children’s room, that has a small table and chairs against the opposite wall, they will look even tinier.
The bottom line: try top step back as much as possible and zoom in a little. Use an angle of view not wider than 12mm (crop sensor camera) or 18mm (full-frame camera).
Tip 4 – The “3 Walls Technique”
When showing bedrooms or any other square/rectangular spaces, it is a good idea to show 3 walls. It gives the viewer a better idea of the size of the space.
But make sure to show very little of the third wall. Again, we don’t want to shoot too wide. In bedrooms try to stay around 12-16mm (crop) or 18-22mm (full-frame).
Tip 5 – One Point Perspective
One point perspective refers to when we position the camera straight on, as opposed to angled. Sometimes it looks better to shoot in parallel to the wall.
I love doing it when there is plenty of room for me to step back since shooting this way in a very wide angle causes even more distortion than when shooting in an angle.
Try doing this when shooting a kitchen island for example, or when facing a French/sliding door to the back yard, etc. This leads the viewer straight forward, to the interesting point that you want to show.
Additionally, following a guide to changing background colors can create a more captivating effect while maintaining the one point perspective.
Tip 6 – Details
Some clients say to me: “Shoot only wide angles. I am not selling the furniture so don’t focus on them”. Well, if that is so, then why spending $2k -$4k on staging? We want to give the viewer a homey feeling.
Shooting a sitting area a little closer, using 20-30mm (crop) or 30-50mm (full-frame) gives us a very intimate feel of the space, almost inviting the viewer to take a seat and relax…
Don’t forget to take a closer look at the appliances. Many times they stay with the property.
Tip 7 – Camera Height
In general, we want to show more floor than ceiling (unless we want to emphasize a unique ceiling). So keep the camera low enough to show more floor than ceiling, but not too low, when shooting in the kitchen and bathrooms.
We want to be able to see the top of the counter-top. In children’s rooms, or wherever there is low furniture, go even lower, especially in closer shots but not only. We don’t want to look down at a low futon bed, a low couch or a fireplace.
Tip 8 – Windows
Two things about windows: keep them clean, and keep the view through them lighter than the interior. Dirty windows are a nightmare, especially when the sun is facing them. It creates a lot of glare and makes the image look “muddy”.
In many real estate photos, it is common to see the exterior and the interior at the same level of brightness. Unless we shoot at twilight, or unless there is a solar eclipse, this is simply not natural.
If you blend multiple exposures, do it carefully, keep the view brighter than the interior. On the other hand, don’t “nuke” the windows.
If the view is ugly, then feel free to keep it very bright, to show fewer details, but don’t make it all-white.
Tip 9 – Verticals and Horizontals
Unless we take some artistic shots or detailed shots of chandeliers etc., we want to keep all vertical lines actually vertical. Don’t tile the camera up or down.
And when we shoot one-point perspective (see tip 5), we want to make sure that the horizontal lines are actually horizontal and parallel to each other

#2. Pouria Safa, Real Estate Photo Co

Pouria provided us with an outline of the preparation of a house for the photoshoot and gave tips on the equipment and the photographing process itself.
Photography is one of the widest professions which has a lot into it besides “click and capture”.
If you are a homeowner, real estate agent, broker or even an investor who wants to have good photos of a property, there is some homework needs to be done before we get into the technicalities.
1. Preparing
Before you take photos, you need to advise your homeowner to follow these steps:
- Make sure all lights and lamps are working.
- Clean up the kitchen and bathroom countertops. The less you have on the counters the better results you will have.
- Move all unnecessary stuff from your living room and all bedrooms.
- By adding a few small colorful flower pots on coffee table, counters and patio table will have nice contrast to your photos.
- Make sure to vacuum entire house and clean all windows.
- When you are taking photos, make sure to open blinds to any window with a nice view to show it on your photos.
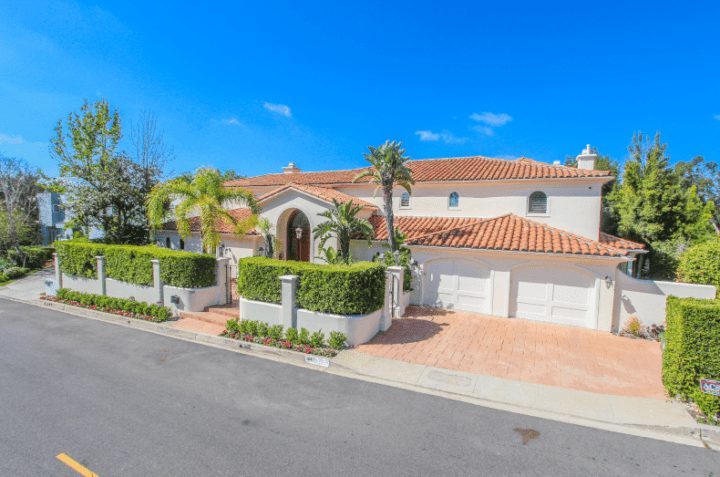
- Based on your location, pick the best time to not have a shadow on your building.
- Check the weather to make sure you have a great day for a shoot. Or if you know how to work with Photoshop to turn the sky blue, then make sure it’s not raining.
2. Equipment
You will have the best result with a professional full frame camera and a wide angle lens. If you have it—great! Use it.
If not, you can use any camera with wide angle lens, or nowadays all smartphones come with kind of wide angle lens and will do the job. But of course it will be inferior to using the right equipment.
Note: for those who need to select the best equipment for their real estate photography endeavors, we put together a few extensive guides, with the help of our real estate photography experts.
They feature reviews of the best models on the market as well as tips for selecting the best tool for your needs.
- Best Digital Cameras for Real Estate Photography
- Best 360 Degree and 3D Cameras for Virtual Property Tours
- Best Camera Lenses for Real Estate Photography
- Best Sony Lenses for Real Estate Photography
- Best Flashes for Real Estate Photography
- Best Tripods for Real Estate Photography
- Best Drones for Real Estate Photos and Video
3. Capturing
Imagine how you would like to present the property, choose the angle and make sure to hold your camera straight and around 4 feet above the floor.
Knowing how to work with real estate photography software, such as Photoshop and Lightroom, is a big bounce, and you can edit lots of detail such as exposure and contrast.

#3. Jacob Macias, Pinnacle Tour

Here are the ten essential tips Jacob and his team use in their practice and kindly shared with us:
- Bracket your images. All cameras, and even some cell phone apps, allow you to do this. Look up videos on youtube on how to bracket with your phone or camera.
- Use a tripod. This simple measure will instantly give you better results.
- Keep your camera straight and level. Never point the lens down or up.
- Include three walls whenever possible to anchor the room.
- Camera height should be about 1/3 up from the floor to emphasize the ground and not so much ceiling.
- Use a professional retoucher for a lot less than a photographer.
- Be mindful of your reflection in mirrors and glass that is in pictures frames, doors, cabinets and windows.
- Be objective with how many images you are using. Select the best and forget the rest. Less is more.
- Shut toilet lids.
- Don’t use a flash pointed directly into the room.


#4. Charlie Taylor, Snap2Close

Additionally to the Vic’s tips on home staging and cleaning, Charlie recommends to follow the next 10 tips to prepare the property:
- Declutter, and then declutter some more.
- Clean and then clean even more.
- Remove all bathmats and toiletries from bathrooms.
- Wash all windows inside and out. Don’t forget glass shower walls and doors.
- Mow, edge, and pull the weeds.
- Remove all hoses, signs and banners, and distracting objects from the front and back yards.
- Remove all religious and political artifacts.
- Make sure that all shutters and blinds are in working order.
- Replace all burned out light bulbs with matching types.
- Make sure all of the lights are on and fans are off the day the photographer arrives.


#5. Vic Devore, DeVore Design

One of the most important components of effective real estate photography is actually not directly related to taking pictures – it’s preparing the property for a photoshoot.
In order to capture the most compelling and beautiful photos, the property must be properly staged and cleaned.
- The floors should be clean and free of visible dust and debris.
- Light bulbs should be working and should all be of the same color.
- Blinds and window treatments are typically best open to allow natural light into the space.
- Personal photographs should be removed or at least limited so the viewer isn’t distracted.
- All the beds should be neatly made.
- Trash cans should be hidden from view, along with any other non-essential utility items like phone chargers, excessive kitchen appliances, vacuums, pet food dishes, etc.
- Each room should be free of clutter, and furniture should be arranged to show as much floor space as possible.
- It’s a good idea to walk through the property with the photographer so any problem areas can be properly identified at the start of the photo shoot.


#6. Jean-Louis Eck, EckFoto

Jean-Louis shared with us the top 7 principles that help him and his team members create images of the highest quality.
In a home marketing plan, photos are the most essential means of creating a positive first impression and having a buyer to contact you for more details.
So here are my most effective real estate photography tips for realtors:
- Focus on high quality images: they will bring many more potential buyers to you.
- Emphasize on space and natural light.
- Work on balancing ambient and artificial light.
- Aim for “real life” images by setting up the exact exposure.
- Create a sense of depth by using wide angle lenses.
- Look for the best composition to provide accurate visual representation.
- Use a tripod, remote triggering and tethering systems for consistency and sharper images.


___
If you want to contribute your expert advice on a topic of your expertise, feel free to apply to our Expert Contributor Program.
___
About the Author
Kristina Morales is a REALTOR® with over 20 years of professional experience. She actively practices real estate in Ohio but also has practiced real estate in California and Texas. Conducting her real estate business in three states has allowed her to gain unique experiences that make her a well-rounded realtor. She obtained her Bachelor of Arts in Business Management and her MBA with a concentration in Banking and Finance. Prior to real estate, Kristina had an extensive corporate career in banking and treasury. She ended her finance career as an Assistant Treasurer at a publicly traded oil & gas company in Houston, TX.