
A-to-Z Real Estate Listing Marketing Plan and Checklist for Realtors
In this article I would like to share with you a 15-step action plan to successfully market your residential real estate listings.
This home marketing plan has been followed by countless top producing real estate agents in the United States and abroad, including my trainees and myself throughout my 20+ year real estate career.
This plan works perfectly in any real estate market regardless of market conditions.
Read on to get new real estate listing marketing ideas and a full marketing blueprint that actually works.
Step 1: Pricing Your Listings to Sell

Price is the most important piece in selling real estate in any market.
During a seller’s market when listings are scarce, or during a buyer’s market when plenty of listings are available, price is a key component to getting a listing sold.
If you do this correctly and the market is good, you may not even need any other marketing steps since the listing will sell itself.
If your goal as a real estate agent is to get a lot of listings, then the first thing you must focus on is becoming a pricing expert.
An expert is a person who is very knowledgeable about or skillful in a particular area. Your goal as a listing agent must be perfecting your real estate agent skills and abilities to price real estate correctly.
Here are some simple steps to becoming a pricing expert in any real estate market:
- Study your local MLS (multiple listing service) daily.
- You want to know every status including all the new active listings, every recent sold (90-180 days), every expired listing, every pending (under agreement) and every back on the market listing.
- You want to know the average days on market (DOM), the property size, the average price per square feet, the showcased features, and the condition of every sold property.
- You should make it a habit to go and physically preview every new listing (even if you don’t have a buyer for it, ask the listing agent to show you the property or go visit it at an open house).
- Visit every ‘for sale by owner’ open house in the area.
- Offer your sphere of influence a free market analysis for their home every quarter (this will help you keep your mind sharp about property values while giving your sphere of influence a free service which helps you become the #1 agent on their list).
- When you study Sold properties, conduct a map view search and study the proximity of the comparables to your potential listing. Pricing can vary block by block — you should know all that information.
- Study each neighborhood’s history by looking at older Sold properties from prior years. Go back 20 years if possible and study the stats and graphs.
You should make it a habit to look at the MLS daily update sheet every morning and take the time to analyze the history of each property you’re planning on listing.
Remember, pricing should be your number one priority if you want to take salable listings.
Step 2: Conducting a Property Assessment for Marketing Purposes

I am talking about assessing the following three topics for each property you’re listing.
You will need these steps even if, after reading this guide, you find this whole process overwhelming and opt for purchasing buyer leads from online real estate lead generation companies.
You need this in order not only to understand what your marketing materials should showcase but also what you should highlight during the showings.
Make a list of all pros and cons about each of the following:
- The location
- The condition
- The features and benefits
Once you have a list of pros and cons for all three, identify the strengths (what I call showcase features) and the weaknesses about the listing and plan your marketing to showcase the pros.
This step is crucial. When you make a list of all the highlights, you will then focus on showcasing these highlights in your marketing materials, during showings, and during conversations with agents and buyers.
In addition, this list will also help you target the potential purchaser and help you with negotiations.
The cons are also important to keep in mind when you meet with the seller to give them feedback and ask for a price reduction.
Step 3: Determine Who the Ideal Purchaser Is

Failing to prioritize potential buyer types is one of the common mistakes rookie agents make.
Appealing to the appropriate audience instead of chasing everyone at once can save you time and marketing budget.
However, be cautious not to discriminate against anyone. This is a very delicate step and you must be fully aware of equal housing opportunity laws.
In potential, a purchaser for your listing can be anyone who would like the property enough to want to own it and be able to afford the purchase (a qualified buyer) and fit the property qualifications.
For example, if you are listing a senior housing condominium, your ideal purchaser isn’t going to be a couple in their late 20’s.
So who do you think this listing is for? Write it down and aim your marketing efforts towards that direction (again, make sure not to discriminate under any circumstance).
Developing An Actual List of Potential Buyers:
If you are a busy agent who’s been working with active qualified buyers, you should already have a buyer in mind for most of your upcoming listings.
A target list of potential buyers can include your sphere of influence, past clients and active buyers list.
Sit down and look at your database and ask yourself: “Who would be a good fit for this property”?
Then write down all the names that come to mind. You should include anyone you know who already lives in the area and anyone else they might know and be able to refer you to.
Put together an action plan to contact everyone you know about this new listing. Be creative and strategize your approach and action plan.
Step 4: Getting Professional Photography (and Videography)

Investing in professional photography and videography must be a top priority if you are planning on becoming a top listing agent and growing your brand.
When it comes to photography, I recommend hiring a professional photographer, preferably a local real estate photographer, with experience and the right tools for the job.
They will need at least 2 mirrorless or DSLR cameras for real estate photography, a variety of wide angle real estate photography lenses, filters with a low light capacity, a variety of lighting (spotlights, etc), and the ability to produce clean, bright and beautiful photos.
Flashes for real estate photography are also used sometimes, but it’s better to opt for natural lighting when possible.
And using a tripod for real estate photography is always a must to avoid blurry and shaky images.
In addition, if you are listing a home that deserves a quality walkthrough video tour, make sure your photographer has the ability to produce such a video (or hire someone else who specializes in producing real estate videos).
In addition to video, you may want a 3D walkthrough. This is a separate service and area of photographers’ qualification. These walkthroughs are made with 360 degree and 3D cameras for real estate tours.
It’s a very convenient way for potential buyers to learn more about the property while viewing your listing online, without having to waste your time on an in-person showing if they don’t like what they see.
These days, drones for real estate photography are also often used for creating high quality aerial photos and videos of the neighborhood, exterior and even interior.
The first most noticeable difference between a ‘for sale by owner’ and a top producer’s listing is the quality of the photography.
Quality photos can make a huge difference when selling a home and it will help you maximize the selling price potential.
Choosing the Right Timing for Your Photoshoot
The preferable weather conditions for photography should be bright and sunny or partially cloudy.
If you can not afford to wait for nice weather, make sure your photographer can use real estate photography software to improve conditions without distorting the reality of the photos.
Getting Outdoor Photos
- Property frontage. Make sure to focus on highlighting the positive features (make sure all vehicles, bicycles, motors, garbage, dumpsters and any other unnecessary items are removed).
- Property backyard (unless the yard is small, cluttered or unattractive). If there is a pool or any other positive feature, make sure to include it in the outdoor photos.
- Attractive outdoor features like a deck, patios, open grass area, whirlpool, tennis/basketball courts, etc.
- Any separate garages and/or storage.
- Any studio or guest house.
- If the property is gated, make sure to include a photo of the gate and entryways.
Indoor Photos
Focus on featuring the property, not the furniture.
- Entry foyer (one photo should be sufficient)
- Kitchen (don’t exaggerate with too many photos of the kitchen, showcase only the important features)
- Dining room
- Living room
- Family room
- All bedrooms
- All bathrooms
- Office/studio
- Walk-in closets
- Finished attic
- Finished basement
- Entertainment room
- Laundry room
- If it’s a condominium or townhouse complex, show the amenities (pool, gym, club house, etc)
Depending on the condition and size of the property, you should at least get enough photographs to showcase all the important features.
A typical 3BR 2BA 2,000 Sq Ft house should have at least 30-40 good photographs. The larger and more expensive the property, the more photos are needed.
Plan accordingly and always judge the photographs from the eyes of a buyer (not the seller).
When Is It Unnecessary to Hire a Professional Photographer?
If the listing is not in good condition meaning it is a fixer-upper or a knock down or a rundown property, there is no need for professional photography.
There are buyers trying to find cheap properties to flip. They are actually looking for homes in bad condition.
A few photos with your smartphone will show DIYers and real estate investors everything they want to see. Just make sure to follow the basic real estate photography tips for realtors.
Focus on items that showcase the potential of the property.
Step 5: Staging and Furnishing Your Listing

Before you schedule the photoshoot, I recommend discussing with the property owner reorganizing and possibly home staging.
Many homeowners have a cluttered home with too much stuff laying around which makes a home look smaller and unattractive. Don’t schedule a photoshoot before you do this step.
If you are not good at staging and organizing, I recommend you hire a professional home stager in your area (if your budget allows it).
A typical stager can cost around $250-$300 for a staging consultation. Most homeowners have enough furniture (or too many).
They would just need to rearrange some of their furniture, or remove and store unnecessary items. A stager can help you redesign and reorganize before your photoshoot.
Home stagers also often work as interior designers. In some cases, for example when selling luxury real estate, you may need this service as well.
For vacant homes, I normally recommend furnishing the home, especially if it is a luxury home.
A typical furnishing costs about $600 per room per month for an average home (it depends on the type of home you’re listing: for luxury properties you should budget an additional 50% or more).
Who Pays for Furnishing?
In most cases, the seller will pay for it. If the seller doesn’t agree to pay for it and you are 100% sure you can sell it quickly if you furnish it, you can secure a long term listing agreement at a high commission rate and pay for it.
Remember, this is a business, and therefore you must make business decisions if you want to become a successful realtor.
In addition to furnishing and staging, I recommend to schedule a deep cleaning and some fresh painting if needed, to make the home look fresh, bright, and organized.
Step 6: Calling Everyone You Know

If you are going to call, who are you calling and what are you going to say when they pick up? A scripted conversation can make a huge impact on the results you are getting.
Before you begin calling to market your listing, I recommend you to role-play your script with a partner — a real estate coach or your broker. Be prepared to answer questions and make notes.
Here is a sample script to call your sphere of influence and past clients when you get a new listing:
“Ring ring… Hello?
Hey __________(name) this is ____________(your name) from ________________ (your company) how are you doing? Great!
_________ (name) I am calling you from work to let you know about a new listing I just listed over on _____________________(property address).
It has 3 bedrooms and 3 full baths, 1800 Sq ft and the listing price is $799,000. It is a real beauty!
Now… since you live in the neighborhood… I wanted to reach out and invite you to an open house I am doing on ___________(day/time).
I can text you a link for the listing and if you know of anyone who’s looking to move into the area, you can share this information with them as well”.
This script is easy to follow, it flows well and straight forward. You can use it, or rewrite it to fit your style.
Who Should You Tell About This Listing?
- Your sphere of influence
- Your past clients
- Anyone else on your database who might be interested or know someone who might be interested
- All your active and qualified buyers
- Homeowners in the neighborhood
- Every active real estate agent and broker in the area, including everyone in your office
- Local businesses
- Local community organizations
Calling and connecting with people is the best way to grow your brand awareness as well as getting your listing in front of everyone.
Calling is an active marketing approach and it can be easily duplicable all across the board with all your listings.
It is the only activity that increases your predictability and performance outcome in a measurable way. I recommend all real estate agents to get comfortable with making phone calls.
Step 7: Conducting Strategic Open Houses

There are 3 types of open houses I wish to include here:
- Open house by invitation. This type of open house is the most valuable approach to grow your brand awareness as a listing specialist in any neighborhood and market your listings with style.
- Brokers open. This is a great way to promote your listing to the other active real estate agents and brokers in your area.
- Public open. This is a public open house where you invite anyone to come and tour the property.
An open by invitation only should be done in the following way:
- Create and order 250 professional open house private invitations from a local printing company for real estate professionals. Make sure you work with a printer who can deliver fast (24 hours).
- The invitation should look like a wedding invitation — stylish and classy.
- Make sure to include the address, the day/time, the price, the number of bedrooms and baths and total sq feet, in addition to your own brand information.
- Make sure it says: “Private Invitation to an Open House”.
- Once you get the postcards (usually within 48 hours), go door knocking around your listing. You want to personally give out these invitations and make sure you talk to as many homeowners in the area as possible (the goal is 250 homes).
- You can also send invitations by mail but you will lose the power of door to door, face-to-face interaction.
A Sample Script when Door Knocking
Hi, my name is ________ from __________(company) how are you?
The reason for my visit, I wanted to give you this private invitation (give the invitation) to an open house for a property I just listed over on ___________(address).
This is not a public open house but a private by invitation only — for the homeowners who live in the area.
If you would like to, come take a look at the house and get an idea of what it looks like in case you know anyone who might be interested.
I am looking forward to seeing you at the open house.
The main reason for an “open by invitation only” is to promote you as “The neighborhood specialist”.
This activity is duplicable and measurable so you can repeat it over and over to grow your business, and it has the potential to get you a lot of real estate listings, if you do it consistently, with every listing you get.
Step 8: Online Marketing For Your Listing

Use online marketing to promote all your listings. When you list a property on your local MLS, it is automatically listed on many other websites including Zillow, Trulia, Realtor.com, Redfin, and many other websites.
Make sure you have a professional real estate profile on these platforms.
To have it listed on as many platforms as possible, you can also use real estate listing syndication websites.
Add the listings you are marketing to your own website as well. In order to populate listings from the MLS, you need a real estate website template with IDX. WordPress IDX themes are the most popular and convenient.
If you already have a website, you may be able to simply add a real estate IDX plugin to it.
There are IDX plugins for WordPress, Wix IDX integration solutions, Squarespace real estate IDX plugins, and tools for other website platforms.
Please note that real estate IDX providers, as well as your MLS will charge a fee for IDX integration services. While not mandatory, this feature helps realtors who get sufficient traffic to their websites.
It also helps having a real estate AI chatbot connected to your website. It can consult interested buyers automatically and schedule showings with them without your involvement.
In addition to the MLS and the websites I mentioned, I recommend using Google Ads (PPC), Facebook Ads and Instagram Ads.
There are many people who specialize in social media and online marketing. It is a good idea to hire them to run your ads and make sure you get results.
YouTube is another huge search engine that many real estate agents aren’t utilizing. Therefore it is a perfect opportunity for your listings to shine and generate leads.
Create your own YouTube channel (if you don’t have one yet) and list all the videos you create for your listings on the channel.
4 Tips About YouTube Videos
- Use the property address as the title of the video
- List all the property details, features etc in the video description (including your information and the best way to contact you).
- The thumbnail should include a photo of the property (you can easily create it on canva.com).
- In the tags section, insert the address, the neighborhood, the city, your brand, your company, your name, the property type etc.
YouTube can bring a lot of attention to your brand and your listings if you utilize it regularly.
Once you are done uploading your video, you can also post that video on any other social media platform to give it more visibility.
Step 9: Utilizing Social Media Marketing
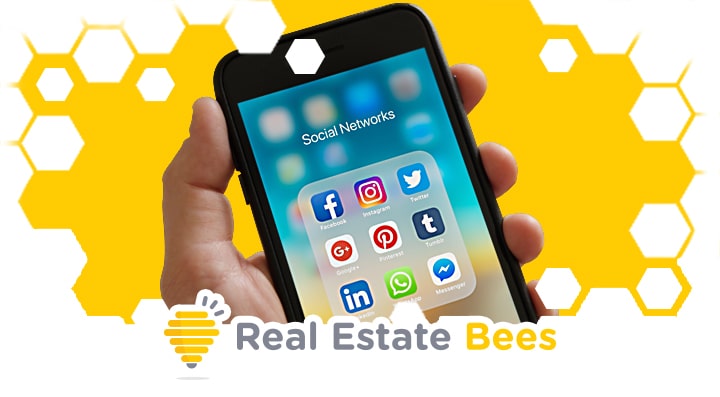
Most of you, I am sure, already have Facebook, Instagram, and Linkedin accounts. If you don’t, now is the best time to create them.
Social media is a very powerful marketing tool, and you can do a lot on the platforms for free (as well as paid advertising).
In addition to your personal accounts, you should also create a Facebook page, Instagram page, and Linkedin page for your business.
This is another way for you to expand your marketing. These platforms give you more options for marketing with an actual business page then they do with your private account.
When you post on social media, you want to create a professional clean looking listing flier with all the showcase features, the best photographs, and all the important information such as price, property size, type, address and all the marketing and legal disclosures.
When posting on social media, you should utilize hashtags that are relevant to your listing.
For example: #realestate #JustListed #NewListing #HomeForSale #Realtors #HomeForSale #123MainStreet etc.
With caution you should also tag specific people (I’m not talking about spamming everyone you know).
For example, you can tag a particular buyer you are working with who might be interested in that listing.
Tag the property owners and ask them to share the listing on their social media. Tag your real estate team members, your real estate brokerage owner and anyone else you think would be interested in that property.
Social media platforms reward your posts and place your post in front of more people when they see that your post has comments and shares.
Make sure you answer all comments as well as like every time someone shares your post.
Some of us are better at creating momentum on social media than others. If you know someone that has influence on social media, reach out and ask if they mind sharing your listing on their social media platforms.
Utilizing influential people on social media is very powerful and can cause a listing to sell very quickly (in addition to building your brand).
As I mentioned before, you should also take advantage of targeted marketing on Facebook and Instagram and boost your posts to reach a wider audience.
If you have a real estate virtual assistant or a social media manager, you can delegate all these tasks and hold them accountable to get you results.
I highly recommend any real estate agent who’s closing 20 sales or more to hire their first assistant and social media manager.
Step 10: Email Blast Marketing
Building a database and keeping it current is a top priority especially if you want to utilize real estate email marketing software.
Every person you meet — your sphere of influence, your past clients, your colleagues, people you meet at networking events etc — should all be added to your database.
When you have enough contacts in your sphere of influence, you may find that you no longer need to pay for buyer leads purchased from realtor lead generators.
When you get a listing, in addition to calling everyone on your list, you should email everyone on your database a “Just Listed” marketing piece.
You can use the same Eflyer you posted on social media. This can and should be automated with any basic CRM system (customer relationship management system) so hopefully you’re using one.
There are CRM for real estate agents specifically. They include automations for email marketing which automate this step and make your life much easier.
To name a few CRM systems for real estate agents: WiseAgent, LionDesk, Top Producer, Follow Up Boss, and many others.
In addition to emailing everyone on your database, I highly recommend you to create a list of all the active real estate agents in the area.
The top active agents can be found inside your MLS system. Simply search for Sold listings in the area of your listing, and you will quickly find who sold them. These are the agents you should have on that list.
Email blast the active agents list with information about the property as well as the easiest way to book a showing or a walkthrough.
Since your listings will most likely be sold by other agents, this step is a top priority.
Make sure your emails contain an efficient realtor email signature that generates leads. It’s an often overlooked component that many miss.
Step 11: Networking With Local Businesses

Your next buyer can easily be referred to you by one of the local businesses in your area.
For that to happen, you’ll need to go out there and network with local business owners and community organizations.
Networking is a fantastic way to promote your business as well as your listings.
If you have a particular listing you wish to promote, bring it to a local networking event and share it with other business professionals.
You will be surprised how many people would love to promote your listing to their sphere of influence.
Before you go to a networking event to promote a listing, I suggest you have a link ready to be shared with everyone, via text or email.
When you are walking around meeting with people, tell them about the new listing and offer to send them a link to the listing and ask if they can share it with their friends or post it on their social media.
Not a must, but still a helpful trick is wearing a funny realtor T-shirt to networking events and to any other public places.
A humorous saying printed on a shirt informing people around you that you are an agent selling houses can have potential buyers approach you to ask about homes you are currently marketing.
Step 12: ‘Just Listed’ Postcards

By far one of the best ways to market a new listing is sending a “just listed” postcard.
This is a very powerful marketing tool, and you should never avoid sending one out every time you list a property.
From my experience and the agents’ I help as a real estate coach, the ROI (return on investment) for postcard marketing is very high (over 500%), especially when your goal is to promote yourself as a listing agent and get more listings.
It sends a message to the marketplace that you are successful and you’re willing to invest in your listings. The rule is simple — the more cards you send out the better return you’ll be getting.
What Size Postcard Should You Send?
I found the 6×11 (aka Jumbo postcard) postcard to be the best.
What Is the Cost?
A printed & mailed out jumbo postcard should cost you between $0.65 – $1.25 depending on quality, quantity and the type of shipping you use.
How Many Cards Should You Send Out?
My rule of thumb is nothing less than 1,000 per listing. But depending on your market, the listing price and your market conditions, the amount of postcards you send out should fit your own marketing budget.
An easy way to calculate a budget for postcards should be: calculate your average sales price and the average commission you can earn per transaction and then invest around 10% of your earned commissions in postcards.
For example, if your average commission is $12,000, a 10% will get you around 2,000 postcards for your new listing.
Sending that amount of postcards to homeowners in the area can give your listing and your brand a very good exposure.
What Should Be on the Postcard?
On one side, you should include a picture of the property (preferably the front of the house), the address, the price, the Sq feet, the number of bedrooms and bathrooms, and some key features.
On the other side, you should include your company brand, your picture, your logo, your name, phone number, email address, website, and social media.
Remember your brand is important, so don’t go cheap. Choose a thick paper, color on both sides, and quality print.
Step 13: Utilizing The Seller’s Sphere of Influence

This step is optional and depends on your relationship with the seller. The ideal situation is when you have a seller who cooperates with you fully and is willing to help you help them.
What we do is, we ask the seller to share their sphere of influence list with us. We need names, phone numbers and hopefully email addresses.
Since every person on average knows a few hundred people, that is a great opportunity for you to grow your own center of influence and expand your marketing efforts.
If the seller agrees to share their sphere of influence with you, (even if it’s a short list), here is what you’ll need to do:
- Enter all their information into your database.
- Call each of them and introduce yourself.
- Let them know you got their information from your client.
- Explain the purpose of your call and ask if they know anyone who might be interested.
- Send them a text/email with a link to the listing.
A sample script for this call:
Hi ____________(name), this is ___________ with _____________(company name). I received your information from _____________(client).
The reason for my call, we just listed ___________’s (client) home in ___________(City/town) and we wanted to invite ___________(client’s) friends to an open house on __________(day/time) in case you know anyone who might be interested in purchasing their home.
Would you mind if I email/text you a link for the listing?
Sometimes you get lucky and the seller will fully participate and share their sphere of influence with you.
Obviously it is for their own benefit to participate and it is your job to explain the benefits to them.
In my experience, there is a 50/50 chance the sellers will participate and gladly share their sphere of influence list with you (at bare minimum they should give you 20-30 names).
If you do this enough times, your database can easily grow to 5,000 people and beyond, which is a requirement if you wish to close 50 plus sales a year.
In addition to asking for their sphere of influence list, you should also ask the sellers to share the listing on their social media channels and tag you on all their posts, or simply share the posts you have on your social media with their friends and all their connections.
This step can only work when your sellers are willing to participate. From time to time you will have a seller who prefers to stay private and confidential.
They won’t be so excited about you contacting anyone they know. In that case, this step is not an option.
Step 14: Vigorous Following Up

Follow up should be a big part of marketing your listings and getting them sold. You must follow up with everyone who looked at your listing and walked through the property.
There are many reasons to follow up with everyone after every showing. Here are a few:
- Keeping the sellers informed about all showings, how people feel about the price and the value proposition. If enough people feel the home is overpriced, it is time to discuss price reduction with the sellers.
- Learning from other active agents in your market about the pricing strategy and their opinion of the value and then collecting this data (preferably in writing, via email or texts) to report back to the sellers.
- Getting feedback after every showing to understand what buyers feel and think about the listing and see if they are planning on making an offer.
- Understanding if there are any interested buyers who are ready to make an offer.
- Creating a “bidding war” atmosphere to increase offers and maximize the selling price.
- Scheduling second showings with serious buyers.
- Preparing the sellers for price reduction (if needed).
- Follow up on all offers and negotiations until you have a solid contract.
Every real estate agent I coached during the last 15 years, who closes 50 plus sales a year is being fanatic about following up.
Marketing is not just about advertising your listings and getting them out there. Following up is what ties everything together and reveals the truth about what is going on with the listing.
Step 15: Price Reduction

Depending on timing, price reduction can provide a positive marketing boost, but it must be done correctly and the timing must be right.
It is recommended that you talk about price reduction already at your listing presentation as part of the pricing strategy.
If you feel the sellers are overpricing, it is recommended to have the sellers sign a price reduction form in advance.
I do not recommend any real estate agent to take overpriced listings. If the sellers aren’t motivated enough to price their home to sell, you should just walk away from that listing.
If the sellers are still in reality land, by all means, get it listed!
A sample price reduction script:
______________(seller’s name), I understand you want to start by listing your home for $__________ although the market conditions are indicating that this price is too high.
In case we don’t get enough showings in the first 2-3 weeks and no offers are coming in, I would like to recommend a price reduction.
Would you feel comfortable to reduce the price to $___________ in _______ days if we don’t get any offers?
There is a big discussion about how much should the listing price be reduced by (percentage) and the timing of the price reduction.
Obviously everything depends on timing, the market conditions, and the seller’s motivation to get their home sold.
It also depends on the feedback you’re getting from everyone you followed up with. If the market is telling you that a 10% deduction is needed, then that is what’s needed.
If you can swing a 5% reduction and still give your listing a marketing boost, do it.
But if during the first 30 days you haven’t gotten any showings, you are way overpriced and you must reduce by at least 10-15%.
If the seller refuses to reduce the price and you followed all 14 steps above and still did not get any serious offers, I recommend withdrawing the listing from the market.
It is always better to withdraw a listing than waiting until the listing expires. It is better for the sellers and it is better for the listing agent. So don’t allow listings to linger while overpriced.
I hope these 15 steps will help you better market your listings and provide you with valuable information you can actually put to action. Remember action speaks louder than words.
New Real Estate Listing Marketing Checklist for Agents (PDF Template)
If you want to have the aforementioned listing marketing steps always on hand, we created a short version of this checklist. It outlined the steps and what each of them means.
Download this real estate listing marketing checklist in PDF for free.
___
About the Author
Ran Biderman is a licensed real estate broker in NY, MA and RI (licensed since 1998). During this time, Ran listed, sold, and successfully negotiated over a thousand contracts. In addition, since 2007 Ran has been coaching and training real estate agents and was privileged to help hundreds of agents and brokers to go beyond 6 figures income.
__
If you want to contribute your expert advice on a topic of your expertise, feel free to apply to our Expert Contributor Program.